Every car owner wants a Hazards and Scratch-free vehicle when they have spent a decent amount of money on paint protection film. The detailer must have all the essential PPF installation tools to get a quality result after the installation.
Opting for the right PPF tools will create a huge difference in the quality of installation. After seeing the results, your customer will go with the smile from the detailing studio.
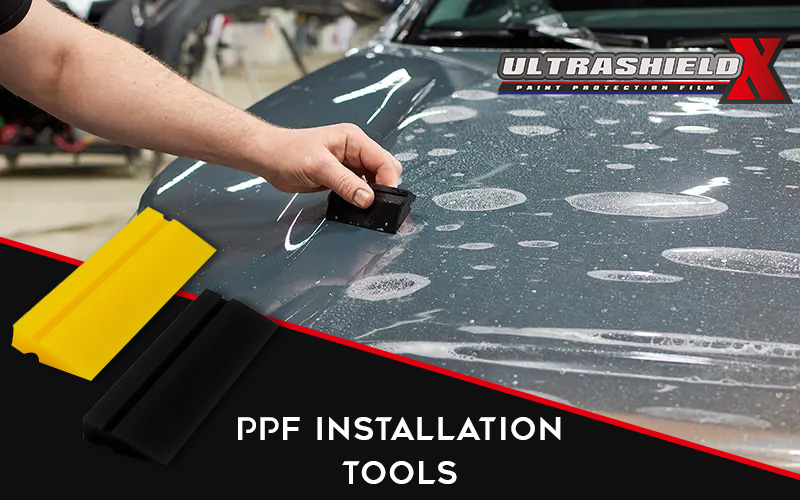
ppf installation tools
In this blog, we will talk about the top PPF installation equipment. Also, we will explain the PPF installation process and areas that need to be covered with PPF.
Paint Protection Film Installation Tools
It would help if you used the right paint protection film installation tools to apply PPF on a car without an application error. Below are some essential tools you need to have before installing PPF.
Tools you’ll require are:
- Clay Bar
- Slip Solution
- Sprayer
- Sharp Knife
- Heat Gun
- Squeegees
1.) Clay Bar:
Clay bars are synthetic or naturally engineered resin compounds designed to remove or lift contaminants from your vehicle’s surfaces. It also effectively removes dirt and pollutants that are not removed even after the car wash. After using a clay bar on a painted surface, it will leave the paint smooth and ready for polishing or waxing.
2.) Slip Solution:
It is a liquid solution, usually made up of water and soap. It is used to lubricate the surface before you install the paint protection film. The film will not directly stick to the surface but will help it slide and adjust to the painted surface.
3.) Sprayer:
This equipment is used to spray the slipping solution to the painted surface before you place and install the paint protection film. Ideally, a good sprayer will deliver an evenly distributed fine mist of a slip solution. Choose a sprayer with a comfortable grip and adjustable nozzles. This will make your work easier.
4.) Sharp Knife:
This PPF installation equipment is a lightweight knife used for accurate cutting while applying PPF. It is a must-have PPF tool used to trim the edges of the film. A good-quality knife will allow a clean cut without hampering the painted surface.
5.) Heat Gun:
This PPF tool emits hot air to make the PPF installation process more manageable. Applying heat makes the film more elastic, allowing for easier manipulation and fitting to curved surfaces.
6.) Squeegees:
They are used to even out the PPF on the surface and remove the slipping solution beneath the PPF. It also eliminates air bubbles from the surface and ensures a smooth and wrinkle-free application.
Where to Install Paint Protection Film?
Now that you have gathered all the PPF installation equipment, you must know where the film should be applied. You can install the paint protection film on both the exterior and interior. The following areas are key to focus on:
Exterior Parts Include:
- Front Bumper
- Hood and Fenders
- Side Mirrors
- Door Edges and Handles
- Rocker Panels
- Rear Bumper
- Headlights and Taillights
- Wheel Arches
Interior Parts Include:
- Door Sills
- Center Console
- Dashboard
- Steering Wheel
- Gear Shift
- Armrests
- Storage Compartment
- Infotainment Screen
PPF Installation Guide Using the Right PPF Tools
To install the PPF perfectly on the painted surface with the right PPF tools, you should have the proper skills and knowledge of the installation process.
In this section, you will learn how to apply paint protection film professionally.
Step 1: Prepare your vehicle for installation
The first step in installing the PPF is to clean the surface with mild soap and remove all the dirt and debris from the painted surface.
With the help of a clay bar, you should eliminate all pollutants and contaminants from the surface. After washing, you should use high-quality microfiber towels to dry the surface. This will ensure no dirt or other contaminants are trapped beneath the film.
Step 2: Start Installation of the Film
Once your surface is ready, you should begin by applying the film. Subsequently, cover one area at a time. Additionally, addressing one panel at a time would be beneficial, enabling you to place and adjust each piece more precisely before application.
Step 3: Cutting The Film
Measure and cut the film according to the panel and leave a margin around the edges for adjustments. Start applying the slipping solution with the help of a sprayer and then place the film.
After adjusting the film, use a squeegee to apply even pressure, removing the slipping solution and allowing the film to adhere to the surface. Trim off the excess PPF from the corner, and be careful not to scratch the car’s paint with a knife or blade.
Step 4: Wait for PPF to Cure
Ensuring the correct installation of the PPF on the surface is the most critical step. The installer must properly size, trim, and apply the film without stretching or loosening it before moving on to the next step.
It would help if you allowed the film to dry and cure to ensure the film is properly attached to the painted surface. Depending on the weather and humidity, it can take a few hours or days.
Conclusion
To sum up, to ensure a smooth PPF-protected surface, you should know the proper PPF installation tools and how to use them. The right PPF tools will make your work easy and ensure a flawless paint surface. Investing in quality equipment or tools ensures you deliver top-notch services to your customers.
0 Comments